Step 2 Big Climber with Slide Assembly Instructions: A Comprehensive Plan
Welcome! These detailed instructions will guide you through assembling your Alpine Ridge Climber & Slide, ensuring a safe and enjoyable play experience for your little ones.
Remember to always prioritize safety, referencing the included precautions and weight limits throughout the assembly process, and download the PDF manual if needed.
Congratulations on selecting the Step2 Alpine Ridge Climber & Slide! This robust playset is designed to provide hours of active fun and imaginative play for young children. It features a sturdy climber, exciting slide, and secure swing set, all crafted with durable materials to withstand outdoor conditions.
Before you begin assembly, please take a moment to familiarize yourself with the components and read these instructions carefully. Proper assembly is crucial for ensuring the safety and longevity of the playset. This playset is intended for a maximum of three children at a time, with a weight limit of 60 lbs per user.
We understand that sometimes things get misplaced, so remember that a PDF download of the assembly instructions is always available on our website for your convenience. Enjoy building a fantastic play space!
Safety Precautions & Important Reminders
Safety First! Adult supervision is always required when children are playing on this Step2 Alpine Ridge Climber & Slide, regardless of age. Regularly inspect the playset for any signs of wear and tear, tightening screws and replacing damaged parts immediately.
Ensure a protective surface under and around the equipment to cushion falls. Maintain a safety zone – a clear space – in all directions from the perimeter of the playset. This area should be free of obstacles. Throughout these instructions, specific symbols highlight critical safety reminders during assembly.
Always adhere to the weight limit of 60 lbs per child. Proper leveling of the ground is essential for stability. Never allow children to climb on the structure before it is fully and correctly assembled. Refer to the manual for detailed guidance.

Assembly Preparation
Before you begin, carefully unpack all components and verify against the parts list. Gather the necessary tools and select a level location for optimal assembly.
Unboxing and Parts Inventory
Carefully unpack all components from the shipping box, taking care not to damage any parts with a box cutter or sharp objects. Lay out all pieces on a protected surface – a drop cloth or cardboard works well – to prevent scratches.
Crucially, compare the physical parts with the detailed parts list included in your Step2 Alpine Ridge Climber & Slide manual. This inventory ensures you have everything needed before starting assembly.
Pay close attention to smaller components like screws, bolts, and washers; these are often packaged in separate bags. Verify the quantity of each item matches the list. If any parts are missing or damaged, do not proceed with assembly. Contact Step2 customer support immediately for replacements. A complete inventory now saves frustration later!
Tools Required for Assembly
Successful assembly of your Step2 Alpine Ridge Climber & Slide requires a few essential tools. A Phillips head screwdriver is absolutely necessary, and a power drill with a Phillips head bit will significantly speed up the process – use a low torque setting to avoid stripping screws!
A rubber mallet can be helpful for gently tapping pieces together, ensuring a snug fit without causing damage. While not always essential, an adjustable wrench may be needed for certain bolt connections.
Importantly, a level is crucial for ensuring the play structure is stable and safe. Measuring tape will help confirm dimensions during assembly. Always prioritize safety; wearing work gloves can protect your hands. Having these tools readily available before you begin will streamline the entire process!
Choosing a Suitable Location & Leveling the Ground
Selecting the right location is paramount for safety and enjoyment. Choose a flat, stable surface, ideally on grass or a resilient play surface to cushion falls. Ensure ample clear space in all directions – at least six feet – around the climber and slide, free from obstructions like fences, trees, or buildings.
Crucially, the ground must be level. Use a level to identify any slopes and address them. Minor inclines can be corrected with leveling materials like sand or rubber mulch placed underneath the structure’s base. A properly leveled foundation provides maximum stability and prevents tipping.

Consider sun exposure and shade; avoid placing the climber in direct, all-day sunlight. Inspect the area for underground utilities before digging or leveling. A well-prepared location ensures years of safe play!

Swing End Assembly (Step 2)
Begin by carefully attaching the swing posts, referencing Figure 2.1. Securely install the swing seats to the posts, ensuring a safe and enjoyable swinging experience.
Attaching the Swing Posts
Carefully position the swing posts according to the assembly diagram, ensuring they are oriented correctly for optimal swing motion. Utilize the provided hardware – typically bolts and washers – to firmly connect the swing posts to the main frame of the Step2 Alpine Ridge Climber & Slide.
Important: Do not fully tighten the bolts at this stage; allow for some flexibility during the subsequent steps. Double-check that the posts are aligned vertically and are securely seated within the designated connection points. Proper alignment is crucial for the stability and safety of the entire swing structure.
Refer to Figure 2.1 for a visual guide, paying close attention to the placement of washers and the correct bolt orientation. Ensure all connections are snug but not overly tightened, preventing potential stress fractures or misalignment during further assembly. A properly attached swing post is the foundation for safe swinging fun!
Installing the Swing Seats
With the swing posts securely attached, proceed to install the swing seats. Begin by connecting the swing chains or ropes to the swing seats themselves, ensuring a secure and reliable attachment point. Utilize the provided clips or connectors, verifying they are properly locked to prevent accidental detachment during use.
Next, carefully attach the swing chains/ropes to the swing post hangers. Again, double-check the security of each connection, confirming that clips or knots are firmly in place. Ensure the swing seats are hanging at a consistent and appropriate height, allowing for safe and enjoyable swinging.
Remember: Limit each user to a maximum weight of 60 lbs (27.2 kg) and supervise children of all ages. Regularly inspect the swing seats and connections for wear and tear, replacing any damaged components immediately.

Climber Assembly
Securely connect the climber ladder and climbing wall components, following the diagrams closely. Prioritize stability and ensure all connections are tight for safe climbing fun!
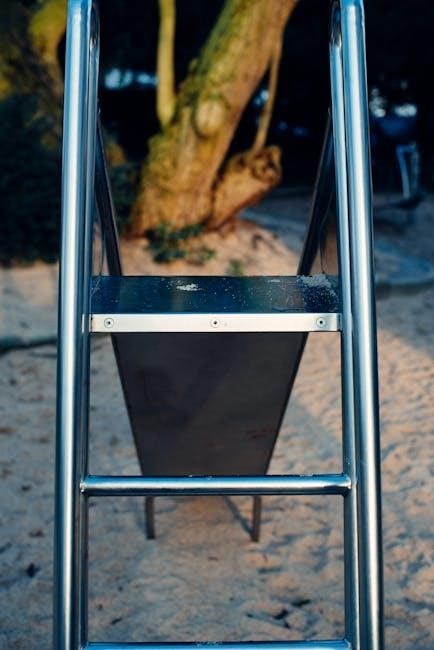
Connecting the Climber Ladder
Begin by carefully positioning the climber ladder against the designated support structure of the play set. Ensure the ladder’s mounting points align perfectly with the pre-drilled holes on the frame – precise alignment is crucial for stability.
Utilize the provided hardware – typically screws and washers – to initially secure the ladder loosely. Do not fully tighten at this stage; allowing for slight adjustments is recommended. Double-check that the ladder is vertically aligned and level before proceeding.
Once satisfied with the positioning, systematically tighten all screws, working in a diagonal pattern to distribute pressure evenly. Avoid over-tightening, as this could potentially damage the plastic components. Finally, visually inspect all connections to confirm a robust and secure attachment of the climber ladder, guaranteeing a safe climbing experience for children.

Securing the Climbing Wall
Carefully position the climbing wall panel against the designated frame section, ensuring the climbing holds are facing outwards for easy access. Align the mounting holes on the wall with those on the play structure’s upright supports.
Employ the supplied screws and washers to initially attach the climbing wall loosely. Maintain flexibility during this phase, allowing for minor adjustments to ensure a flush fit. Verify the wall is securely in place and doesn’t wobble before fully tightening the fasteners.
Systematically tighten all screws in a crisscross pattern, distributing the pressure evenly across the mounting points. Avoid excessive force to prevent damage to the plastic. Inspect all connections thoroughly, confirming a stable and secure attachment of the climbing wall, providing a safe and challenging climbing experience.
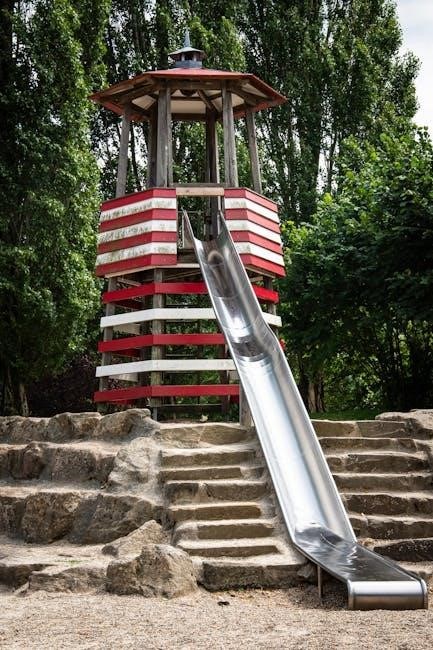
Slide Installation
Attach the slide temporarily with screws, preparing a level area for optimal stability. Raise the front of the unit to properly align and secure the slide.
Attaching the Slide to the Play Deck
Begin by carefully positioning the slide beneath the play deck, ensuring proper alignment with the designated attachment points. Temporarily secure the slide using three of the provided 14 x 1/2 inch pan head screws. This initial attachment allows for adjustments and ensures a snug fit before final tightening.
Important: Before fully securing the slide, raise the front portion of the climber unit. This elevation facilitates easier alignment and contributes to the overall stability of the structure. Double-check that the slide is flush against the play deck, creating a smooth and safe transition for children.
Once satisfied with the alignment, proceed to fully tighten all three screws. Ensure they are firmly in place, but avoid over-tightening, which could potentially damage the plastic components. A secure attachment is crucial for preventing wobbling and ensuring the slide remains safely connected during playtime.
Ensuring Slide Stability
Prioritize stability by meticulously reviewing all connections related to the slide. Confirm that the previously installed screws are tightened to a secure level, preventing any unwanted movement or wobble. Regularly inspect these fasteners during and after assembly.
Crucially, the entire climber unit must be positioned on a level surface. Uneven ground can compromise the slide’s stability and create a safety hazard. Revisit the leveling process outlined in the preparation steps if necessary, adding support where needed.

Remember to maintain a safe play area around the climber. Adhere to the recommended safety zone, keeping a minimum distance in all directions from the perimeter of the equipment. Supervise children during play and routinely check for any signs of instability or wear and tear on the slide.

Final Assembly & Checks
Congratulations! Now, meticulously tighten every screw and connection for optimal safety. Verify weight limits are understood, and always supervise play. Download the PDF manual if needed!
Tightening All Screws & Connections
Crucially, after completing the main assembly stages, a thorough check of all screws and connections is paramount for ensuring the structural integrity and, most importantly, the safety of the Step2 Alpine Ridge Climber & Slide. Begin by systematically inspecting each joint, utilizing the appropriate tool to firmly tighten every fastener.
Do not overtighten, as this could potentially strip the screw holes or damage the plastic components. A snug fit is sufficient to provide a secure hold. Pay particular attention to connections involving the slide, swing supports, and the play deck, as these areas experience significant stress during use.
Double-check all connections, gently attempting to wiggle each component to confirm its stability. If any movement is detected, re-tighten the corresponding screws. This meticulous process guarantees a robust and safe play structure for your children. Remember, consistent maintenance and periodic re-tightening are recommended.
Weight Limit and User Guidelines
Safety first! The Step2 Alpine Ridge Climber & Slide is designed to accommodate a maximum of three children simultaneously. It’s vitally important to adhere to the individual weight limit of 60 lbs (27.2 kg) per user to prevent potential injuries or damage to the structure.
Adult supervision is always required, regardless of the children’s ages, to ensure safe play practices. Encourage children to use the equipment responsibly, avoiding overly aggressive behavior like pushing or shoving.
Regularly inspect the climber for any signs of wear and tear, promptly addressing any issues. Educate children about appropriate usage, emphasizing the importance of using the slide one at a time and entering feet-first. Following these guidelines will maximize enjoyment and maintain a safe play environment for everyone.
Locating Replacement Manuals (PDF Download)
Lost your instructions? Don’t worry! Step2 understands that assembly manuals can sometimes go missing during the setup process or over time. To ensure you always have access to the necessary guidance, we’ve made it incredibly easy to obtain a digital copy of your Alpine Ridge Climber & Slide assembly instructions.
Simply visit the official Step2 website and navigate to the product page for your specific climber model. There, you’ll find a convenient PDF download link readily available for your use. This downloadable manual contains all the diagrams, step-by-step instructions, and safety information you need for successful assembly and maintenance.
Having a digital copy readily accessible ensures you can revisit the instructions whenever needed, simplifying repairs or re-assembly in the future. Step2 is committed to providing ongoing support for your play equipment!